Setting up Projects in Coreloops
This guide will walk you through the steps required to set up live projects in Coreloops. Follow each section carefully, and refer to the provided screenshots for additional clarity.
1. Download the BoQ Template
- Create the new project by clicking “New Project” the dashboard or projects page.
- Enter your project details and then save the new project
- Navigate to the Project Overview page.
- Go to the Progress tab.
- Click the Import BoQ button. This opens a popup where you can either download the template or upload your Bill of Quantities (scope of works).
- Select Download Template to get a copy of the Coreloops Bill of Quantities template.
2. Fill in the BoQ Template and Add Cost Codes
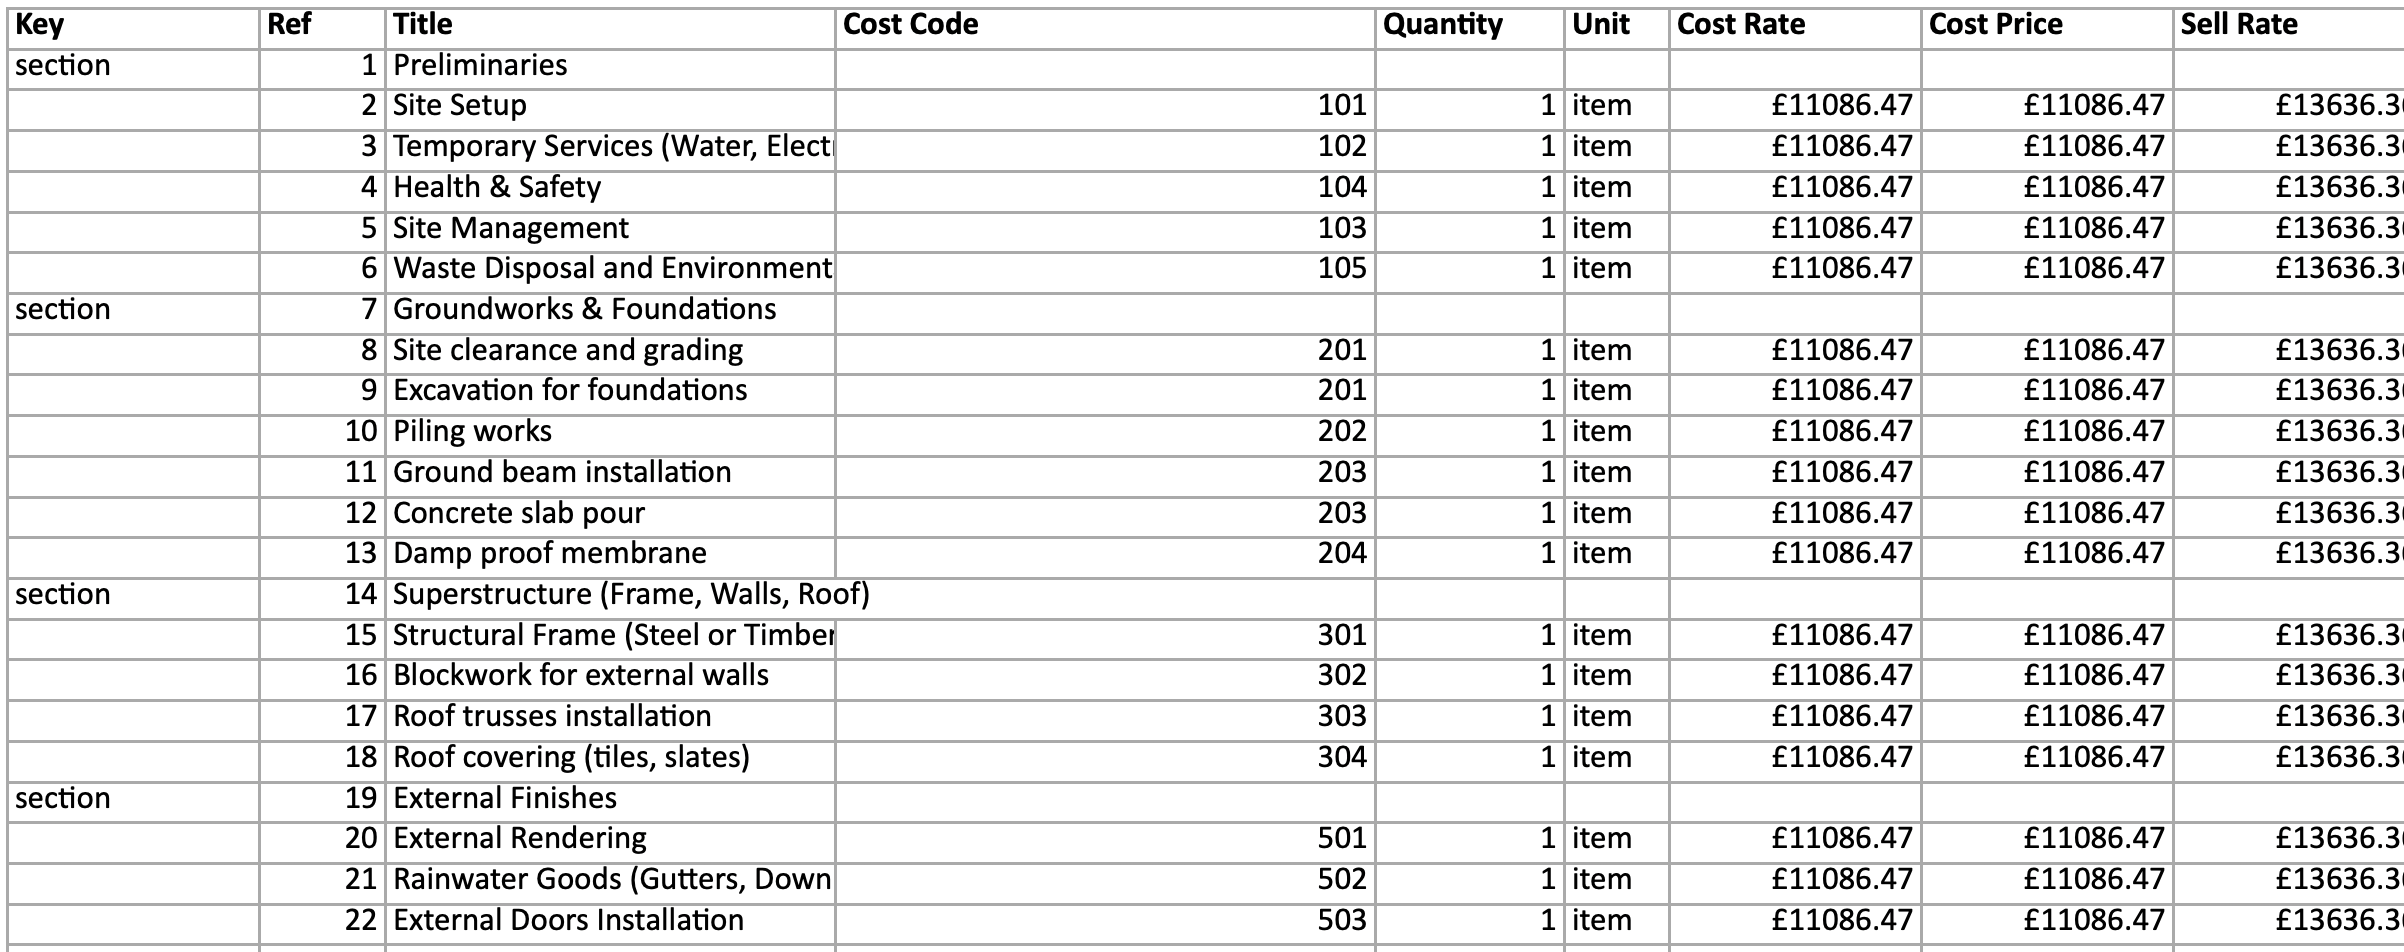
- Open the downloaded template and fill it in with the line items from your BoQ.
- Use the Key Column to reference either Section or Subsection, adding the corresponding title in the adjacent cell.

- Assign a Cost Code to each line item to ensure accurate mapping during the upload.
- Remove any variations or mark the quantity to 0 so that you can save your tender value (Value at the start of the project) before adding the value of variations.
- Save the completed document.
3. Upload the BoQ Template Without Variations
- Return to Coreloops and reopen the Import BoQ popup.
- Upload the completed template by clicking the upload area or dragging and dropping the file.
4. Start the Project and Lock the Tender Value & Budget
- Review the BoQ and Scope of Work (SoW).
- Once confirmed, click Start Project.
Warning: After starting the project, the BoQ cannot be changed, except for variations. Proceed only if confident in the BoQ's accuracy.
5. Add Variations
- Go back to the Progress tab and then select the Bill of Quantities sub-tab.
- Click Edit BOQ
- Add variation orders that have occurred since the start of the project or update the quantities back to 1.
- Save the changes and return to the Bill of Quantities tab.
- Check that the current value and budget has been updated to include the total value and budgeted costs of variation orders
6. Bring your project costs up to date
Add Costs to Each Cost Code and Fill the Cost Document
- Calculate and record costs for each cost code to date.
- Use the provided document template to input all the costs to date for each cost code.
- Add the costs for each cost code on a separate line item.
- Save the completed cost document.
7. Upload the Cost Document and Split Costs by Project & Code
- Navigate to the Documents section in the sidebar.
- Click the Add New button and select Upload Document.
- Once processed, refresh the page.
- Click Review and proceed to the document review page
- Check and enter all required fields.
- Use the Split button next to the cost code field to assign costs appropriately.
- Assign the costs to each cost code. Save changes and then Approve the document.
- This will then bring the actual costs in all of your projects up to date.
8. Forward Real Costs and Approve Timesheets
- Begin forwarding invoices and costs to update your cost report.
- Create and approve timesheets for accurate financial tracking.
9. Add the Last Certified Application
- Navigate to Project Overview > Progress > Valuations.
- Click Add New and input your most recent certified application details.
- Add certified percentages and values directly into the BoQ.
- Once satisfied, click Save and Approve.
10. Prepare the Report for the Next Valuation
- Go to the Valuations sub-tab in the Progress tab.
- Click New Application and select Import Valuation.
- Download the template from the popup.
- Fill it in with the applied and certified figures to date.
11. Upload and Approve the Valuation
- Save the updated template.
- Return to the Valuations sub-tab and upload the document.
- Refresh the page and verify that the financial data reflects the updated information.
By following these steps, you'll efficiently set up and manage your live projects in Coreloops. For further assistance, please reach out to us for any help.
